
Iceland. After the first two days on Laugavegur, trekking in Iceland counts as a water sport for me. I curse the rain cover for my backpack, which always flies off halfway, and I no longer believe in Goretex boots and lightweight gear. On the way, I discover my hidden talent for repairing outdoor equipment: sleeping mats, shoe soles that fall off, fissures, and broken backpack buckles... On the last day and after about 55 kilometers on Iceland's best-known long-distance hiking trail, I finally feel I'm prepared for anything and immediately walk further over the Fimmvörðuháls to Skógar. Simply irresistible!
Unassigned, unpaid advertising. The article contains affiliate links.
Icelandic Weather provides Diversity
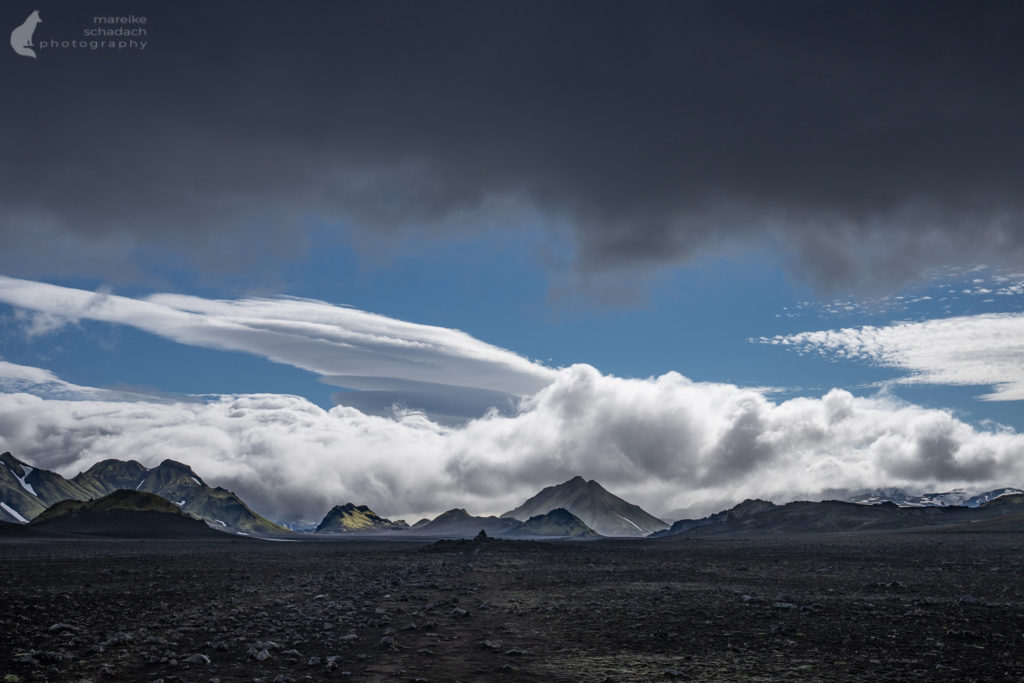
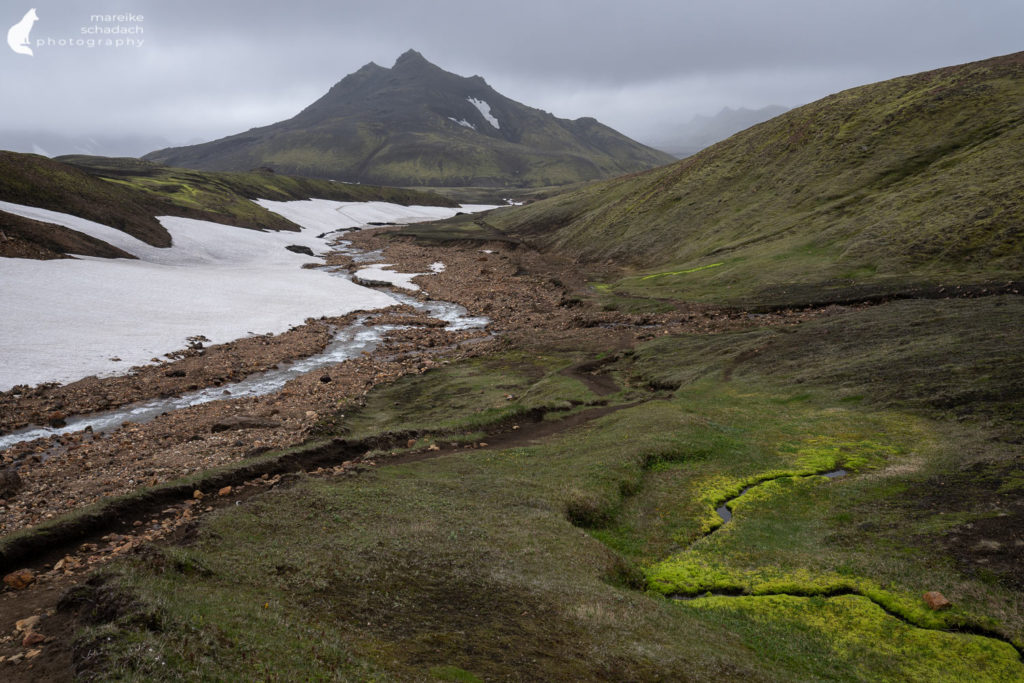
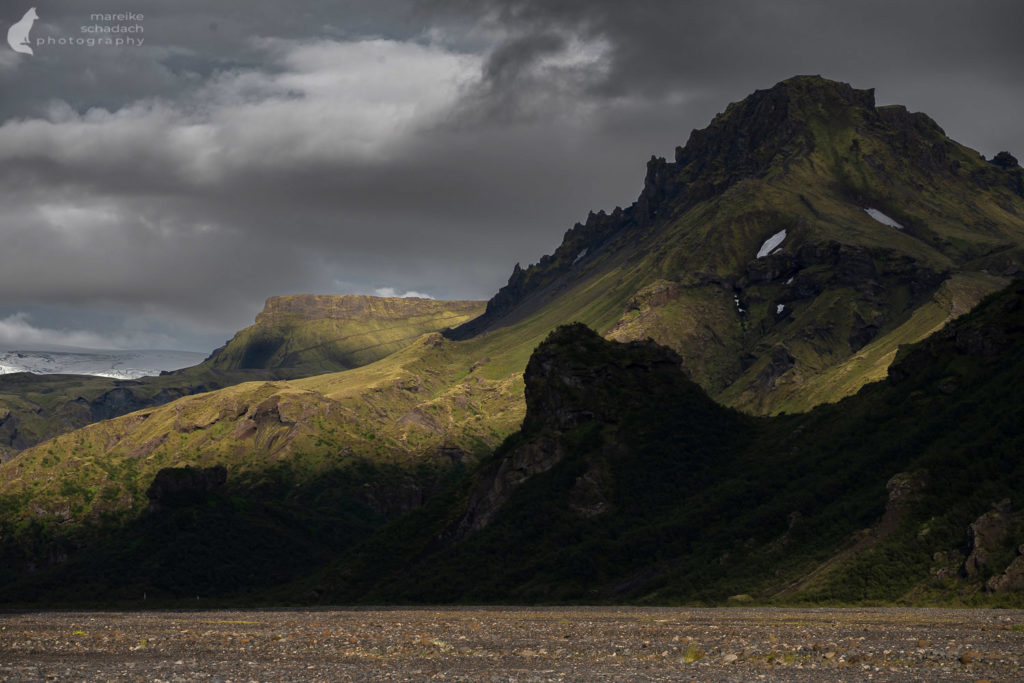
Laugavegur is considered one of the most beautiful trails in the world. But what exactly makes trekking on Laugavegur in Iceland so special? It can't be the Icelandic weather, can it? Or maybe it is because the weather gives the trail a very special atmosphere: light fog and low-hanging clouds made me not completely rule out the existence of trolls. Besides, the clouds gave my photos a great dramatic effect and the everlasting wind made me feel nature even more intensely. The quick weather changes also brought a certain dynamic to the hike: no sooner had one applied sunscreen than one was putting on one's rain jacket and looking for one's gloves.
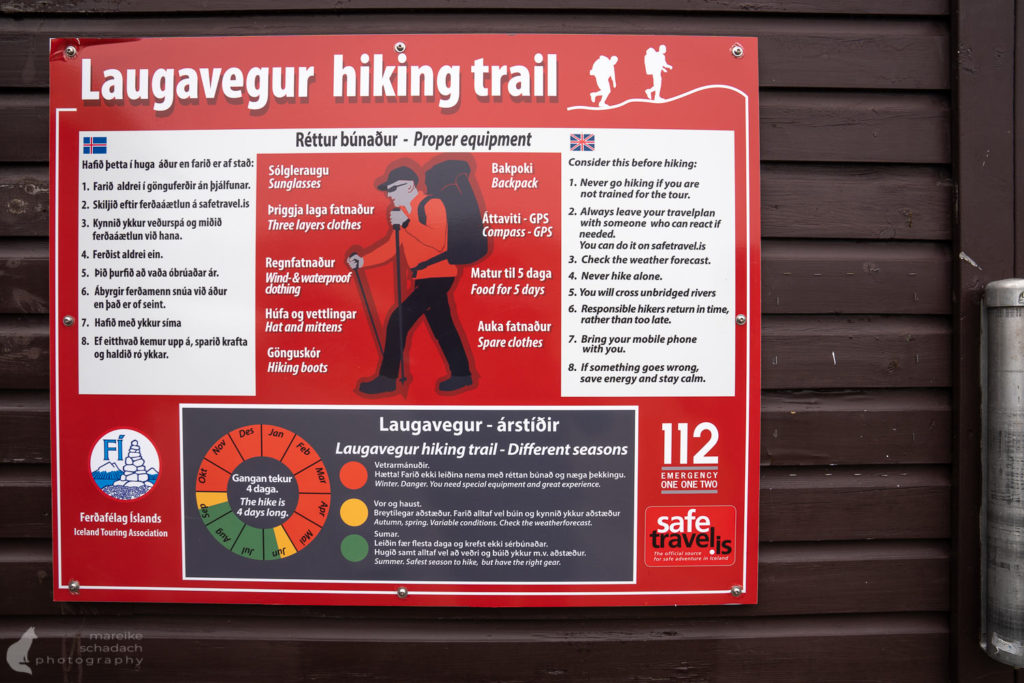
Be prepared for bad weather and take waterproof and warm clothes with you. Even if the weather forecast promises only sun! You are on the trail for several days - the forecast can change. Don't forget: People have already frozen to death on the Laugavegur in bad weather!
Weather forecast for Iceland: vedur.is
More info about trails in Iceland: safetravel.is
What you will read here
There are already numerous blogs that describe the Laugavegur in all details and provide many facts. I don't want to write another one. So in the following I will write about some details that we experienced on the tour and that might help you when it comes to more than just GPS routes, camps and bus connections.
Do you know how to pack your backpack? Or how to calculate your own walking time? What is important when fording a river? Did you check your equipment beforehand for weak points or did you think about what you should take with you to repair your equipment or what spare parts you should bring?
You can read that and a few stories about it in the next chapters.
And why my post has this somewhat ambiguous title? Well, it corresponds to the naked truth. And there are already so many articles called: "Guide for the Laugavegur", "XX Tips for the Laugavegur", "Laugavegur - everything you need to know"... My title sounds more exciting, doesn't it?
The landscape drives to hike
Every day on Laugavegur surprises with a different kind of landscape. This motivates one to keep moving forward, after all, one wants to see what great view is hiding around the next corner or behind the upcoming hill. The more beautiful the landscape, the easier it is to walk. Even with my additional five kilograms of camera equipment.
We walked the trail in four stages:
| Stage | Length | Vertical meters uphill |
| Landmannalaugur – Hrafntinnusker | 12 km | 470 m |
| Hrafntinnusker – Alvtavatn | 12 km | 490 m |
| Alvtavatn – Botnar | 16 km | 40 m |
| Botnar – Þórsmörk | 15 km | 300 m |
Where is the luggage?
Imagine the following situation: You have well-tried and tested outdoor equipment - boots, sleeping pad, trekking backpack, sleeping bag, clothes, and, and, and... And then suddenly everything is gone. You wait for it to finally reappear, but no one can tell you where your luggage has gone. A week passes, the second week passes, and the third. And then you fly to Iceland to trek the Laugavegur and have either old, borrowed, or newly bought equipment. Thanks, Lufthansa! My partner's luggage was lost on the flight from Los Angeles to Berlin while changing planes in Frankfurt. It took three months for it to turn up! Hard to believe, isn't it? But alas, this happened with some regularity on several airlines in the summer of 2022.
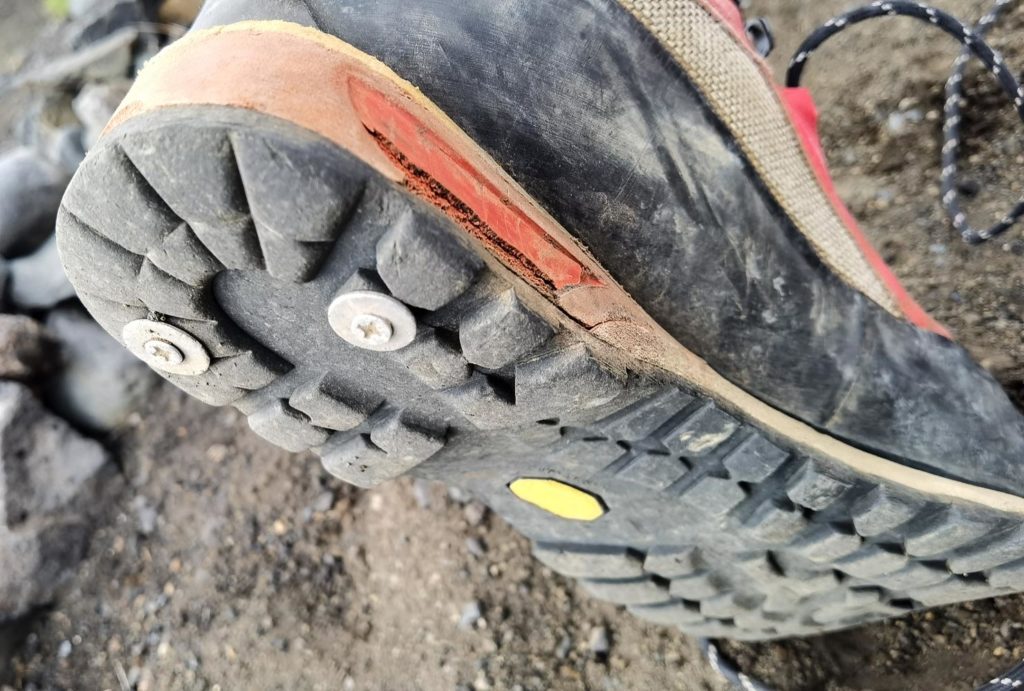
My partner starts the Laugavegur with my 20-year-old discarded trekking backpack, an old inflatable sleeping pad, an aged sleeping bag, and borrowed mountain boots that were fortunately already broken in. That the soles almost fell off, we have only seen during the tour... And that the sleeping pad will not last long, we have also not suspected.
Check the equipment before the tour for the condition (the owned and borrowed) and reconsider the durability of some parts.
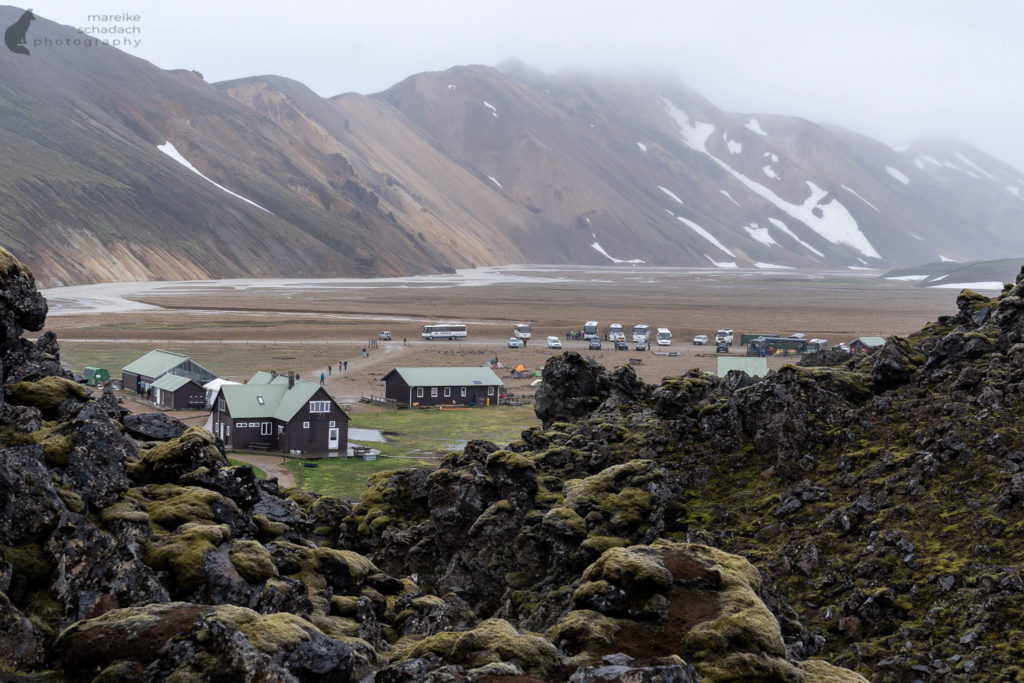
Stage 1: Landmannalaugar to Hrafntinnusker
After a four-hour bus ride through the rain, we arrive in Landmannalaugar in the rain. Here we are supposed to start. However, my motivation is low, my backpack is heavy and somehow there are suddenly far too many people here. At the same time as our bus, two other buses arrived, whose passengers now spread out in the parking lot, visiting the toilet and besieging the party tent kindly erected by the campsite owners. Did the bus driver not tell something about a food truck with hot soup? I suppress the thought and unpack our sandwiches instead. I eat quickly so that the bread doesn't get so wet. Then we're off. All the others - most of them were day visitors - have already set off and we now have a free path.
After the first 5 minutes, I realize that I have not packed my backpack well: the camera and the telephoto lens are on top, and my backpack wobbles on my back, which is especially annoying when climbing over the first rocks. I repack: the lens comes down further, close to my body, about where my shoulder blades are. And the camera comes out around my shoulder because the photo motifs will not be long in coming. As rain protection for the camera, I have a waterproof bag* handy, which I put over the camera again and again during the day. Also good, but not waterproof, is the softshell cover for the camera from Peak Design*.
Here's how: Pack your backpack correctly
- Light equipment such as sleeping bag, sleeping pad, down jacket down.
- Medium-weight gear, such as clothing to the top outside.
- Heavy load camera lenses, tent, provisions, drinking water at shoulder height as close to the body as possible.
- Small items that are used frequently in the lid compartment.
- Keep a first aid kit handy.
- Use pack sacks to keep your gear organized and dry.
- Backpack too small? You can also attach bulky, light luggage to the outside.
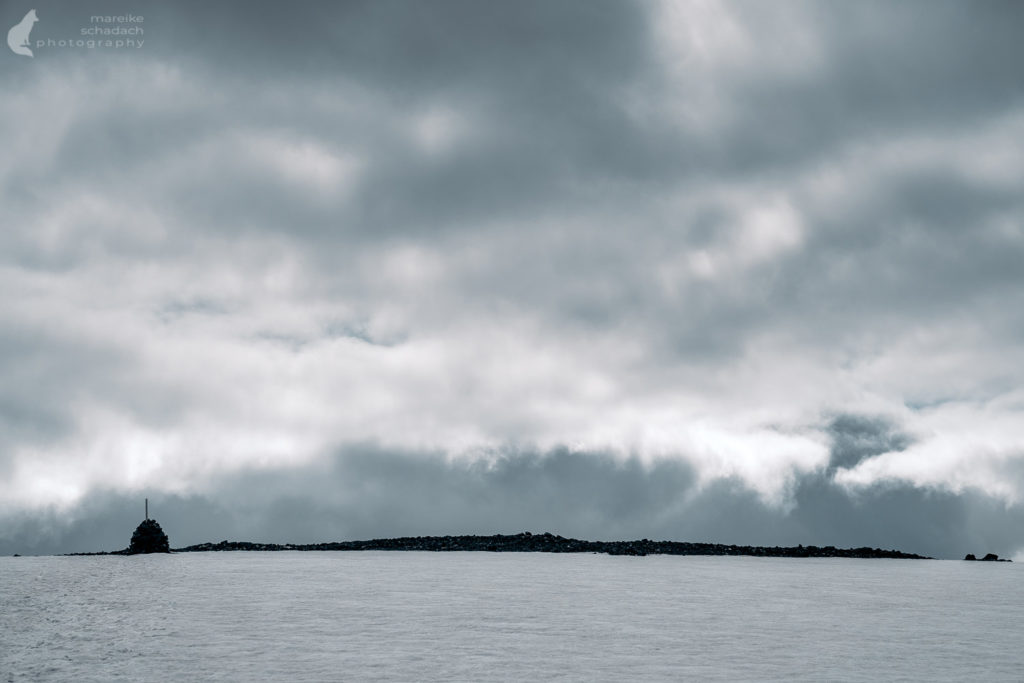
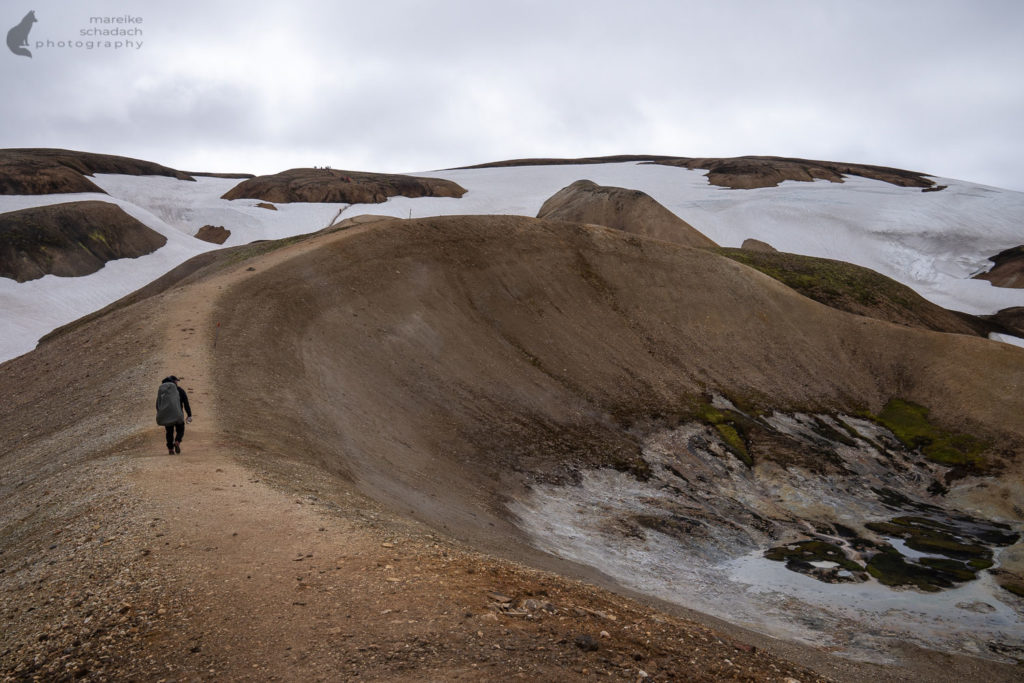
We walk through the geothermal area of Landmannalaugar with smoking solfataras, colorful rhyolite mountains, yellow sulfur crystals, pitch-black volcanic rock as well as whimsical lava formations. Again and again, great views open up, like the one over the black lava field Laugahraun, colorful mountain flanks, and white snow areas. Finally, in the last section of the stage, we cross extensive snowfields. As soon as the glassy, black obsidian then mixes with the rocks, the hut at Hrafntinnusker is not far away. The mountain is littered with obsidian, which you may already know from the series Game of Thrones as dragon glass.
The camp at Hrafntinnusker is very exposed and partly covered with snow. The places for the tent offer some wind protection with small stone walls made of obsidian.
Did you know that it is forbidden to take stones from Iceland?
Do not forget!
Do you want to spend the night in the hut? Then book early, because there is not much space. If you bring your tent, you don't need to make a reservation. The cost for a tent with two persons is 5.000 ISK (as of 07/2022). If you go to pay in the hut, take a little more money: there are canned beer and candy bars.

This is how it works: Calculate walking time
Do you want to know how long you will be on the way? This is how you can estimate your time:
1. Time needed for the difference in altitude: per hour 300 hm in ascent, 500 hm in descent, or your personal experience value.
2. Time needed for the walking distance: 4 km per hour or your personal experience value.
3. Divide the smaller value in half and add it to the larger value. This is then your approximate time requirement without breaks.
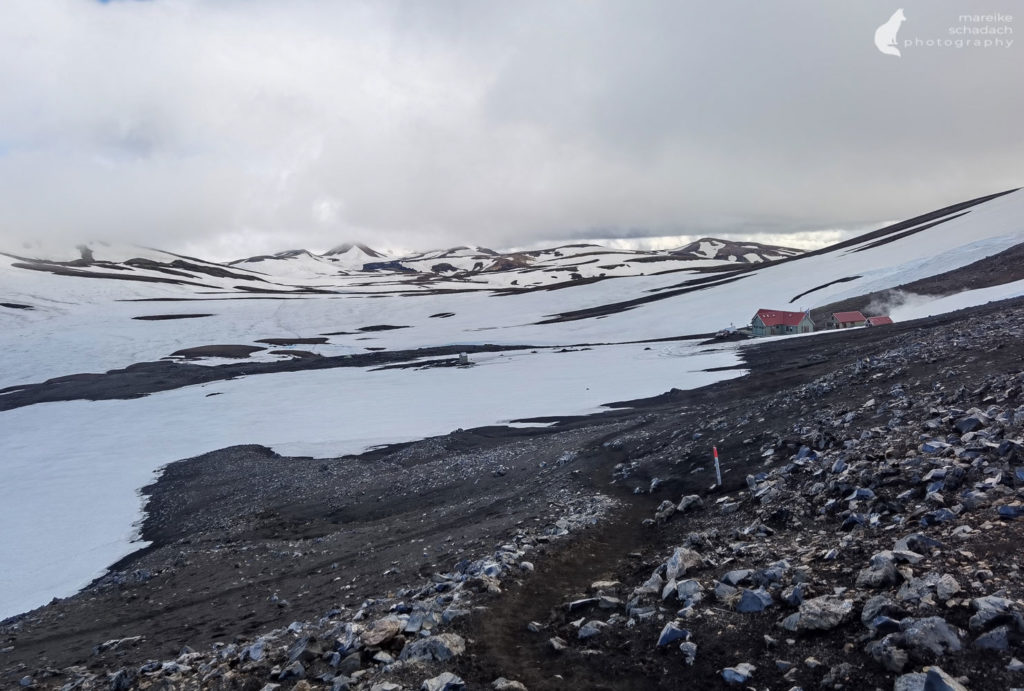
Stage 2: Hrafntinnusker to Alftavatn
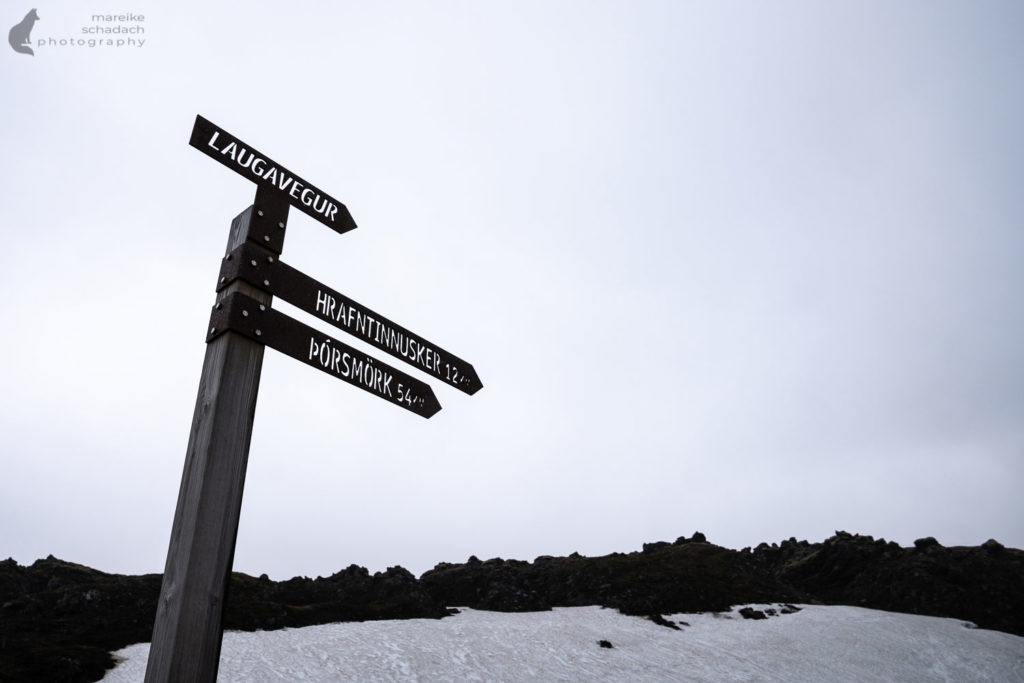
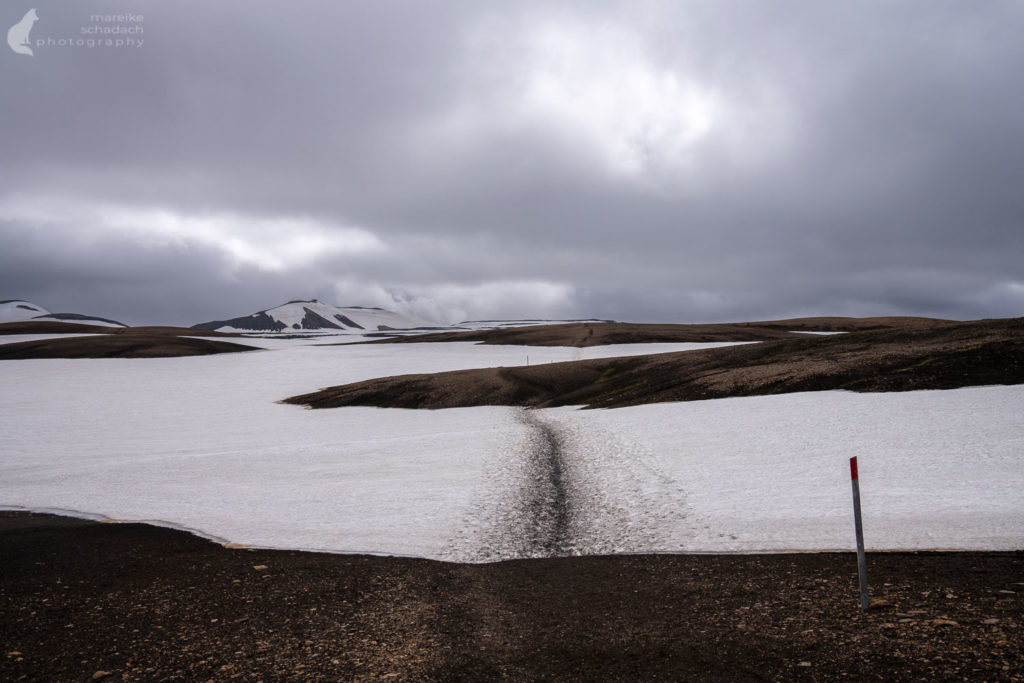
The second stage starts in the snow. The trail is easy to see here, as a trail of dirt stretches across the white snow fields. The dirt comes from the exposed, rocky sections of the trail that alternate with the snow. It is much easier to walk on them. When we left, it was foggy, the wind kept whipping rain in our faces, and we shimmied from trail marker to trail marker, which are particularly large up here and therefore easy to see. We struggle with our rain covers, which the wind keeps tugging off our backpacks. Also, additional belts, which we tie around, help only for a short time. (The next day I packed the entire contents of the backpack waterproof in pack sacks and garbage bags and hiked without rain cover).
How much Rain, Wind and Fog should it be?
At some point, the point is reached that it is better to spend the day in the tent and wait until the weather gets better. Where exactly this point lies is difficult to say, it depends on many things. Better think twice about what suits you. Plan a buffer day and take a little more food with you. That way you can just sit out bad weather.
We set off for the day - after checking the weather report, which promised an improvement in the weather. Wrapped up warm and rainproof, with the map in a waterproof map case*, compass, GPS, thermos and Emergency Shelter*, where two of us would have found quick shelter.
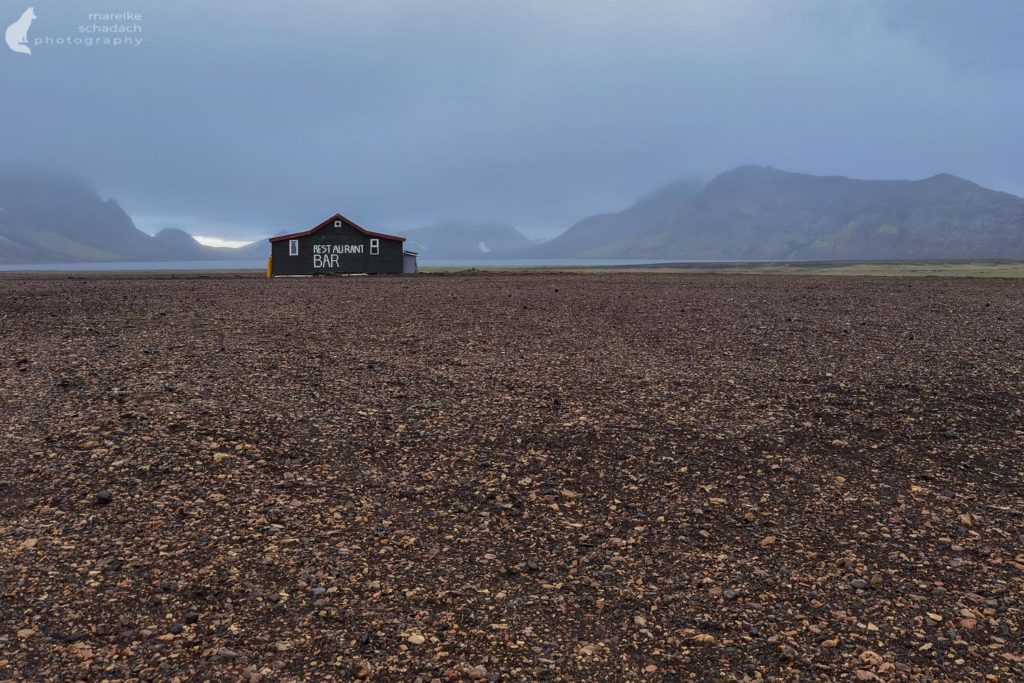
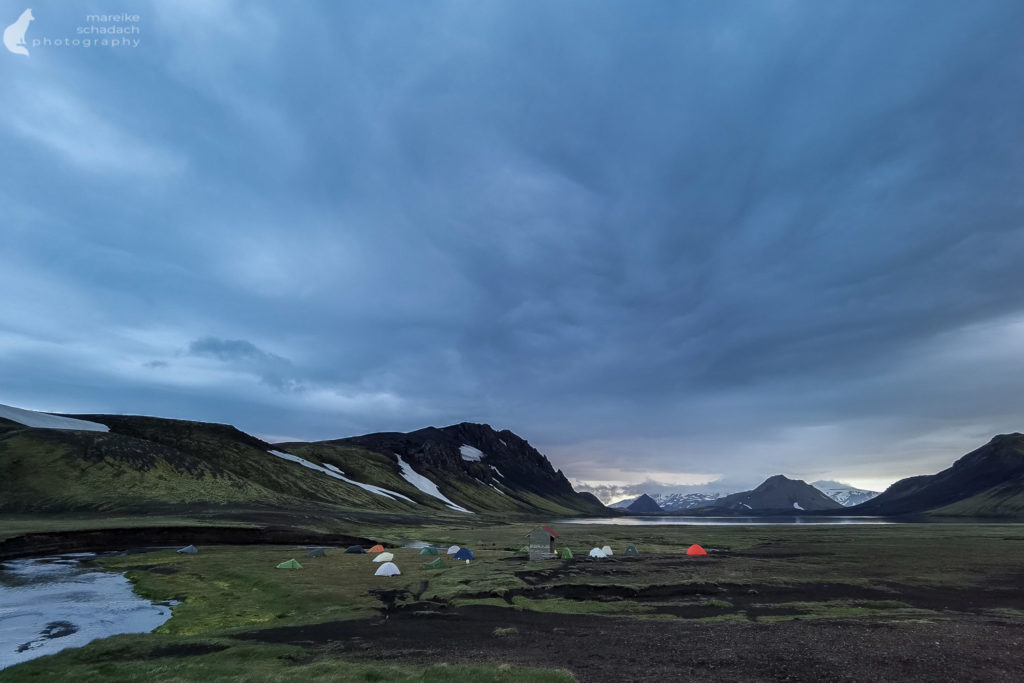
At some point, it clears up. We look into a wide valley and see at the very back the lake Alftavatn with the hut. The path now goes downhill and the landscape becomes greener again. The camp at the lake consists of two cabins, a shower, and toilet house, and - here it comes - a restaurant! It is tiny, but all the more cozy for it.
When there is no Wind in Iceland, there is a Storm...
What was blowing across the meadow as we pitched our tent was definitely not wind. We held our tent cover down with our hands, feet, and stakes, and then somehow managed to tie everything down and tighten it up. The aluminum poles bent threateningly far toward the ground but held up after further support from a trekking pole. The tent meadow at the lake offers no protection, everything is flat, and there are no stone walls or bushes behind which one can warp.
The Thing with the Sleeping Pad
After we have set up the tent, the next surprise comes: one of our sleeping mats breaks down. It keeps the air inside, but some of the internal weldings of the single air chambers have come open. One half of the mat is now just a big bump, the suitable lying surface has been halved to about 30 centimeters... only brute force helps: we press forcefully on the mat and let more of the welds open up. Deflate a bit and then it somehow works out with lying down. But comfortable is different.
The sleeping pad was a bit older. To me, this has already happened with another similar mat after 8 years. Whether I continue to rely on air-filled mats with this chamber system on tours??? Rather not! What experiences do you have? Please drop me a line!
Currently, I use the Therm-a-Rest NeoAir Xtherm*. It's light, compact, and super warm with an R-value of 6.9. Inside it, there are many small triangular chambers that provide thermal insulation. I hope it lasts a little longer.
Stage 3: Alftavatn to Botnar
The night it stormed and rained continuously. In the morning it was a little less stormy, but the rain just won't stop. Slowly the campground empties, at some point, there are only three tents left, including ours. During a short rain break, we take down and pack our backpacks. About 16 kilometers lie ahead of us. We decide to stop at the restaurant after 100 meters. A perfect rain shelter with coffee and cake. Well... it was already noon (it opens only at 12:00). We wait here until the rain stops and then start our daily stage with dry clothes. Since it does not get dark in Iceland at the beginning of July, one is fortunately completely free in his timing!
Good to know: sunrise and sunset in Iceland
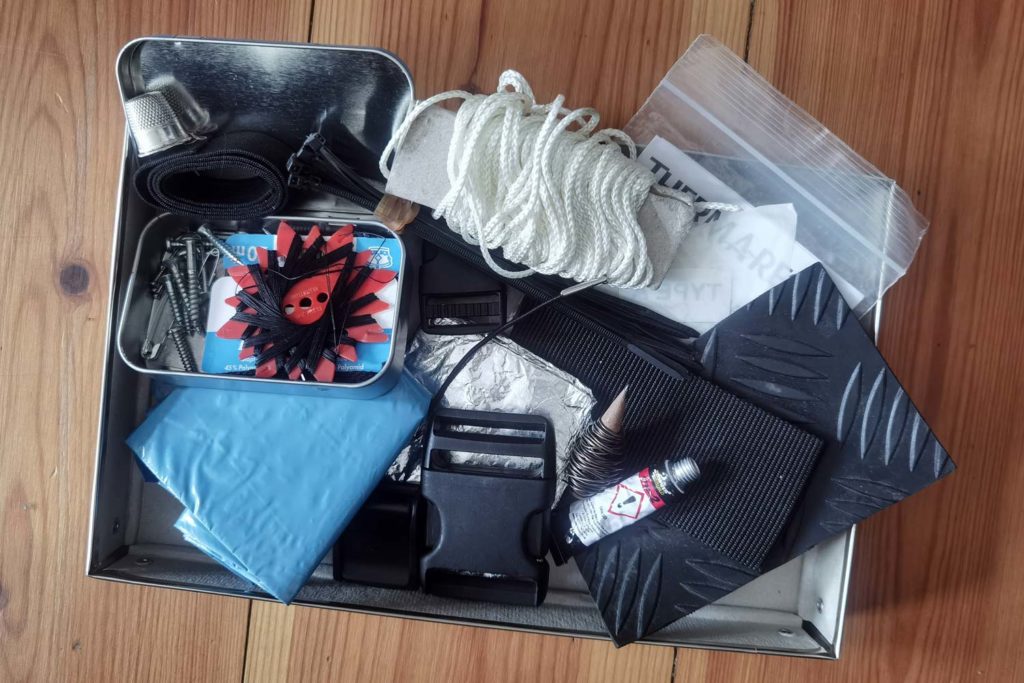
Spare Parts and Repair Kit
Before the tour, I considered for a long time, which spare parts and what I should take along for possible repairs. After Iceland, we went to Greenland for hiking at the Tasermiutfjord and for a kayak tour through the fjords. So it was worthwhile to think about these "little things". And maybe take a little more with us: Screws, cable ties, spare buckles for the backpack, armor tape, sewing kit, my Leatherman, and so on. I needed the sewing kit on the very first day, a spare buckle on the second day, and the screws on the third. What else I had with me but didn't need: floral wire, nails, rubber bands in various widths, super glue, buttons, rivets, ribbon, small leather/rubber pieces, velcro, and sturdy trash bags. In addition, I have collected on the trail everything possible, which was so on the way and seemed useful and thereby done equal to the environment what good.
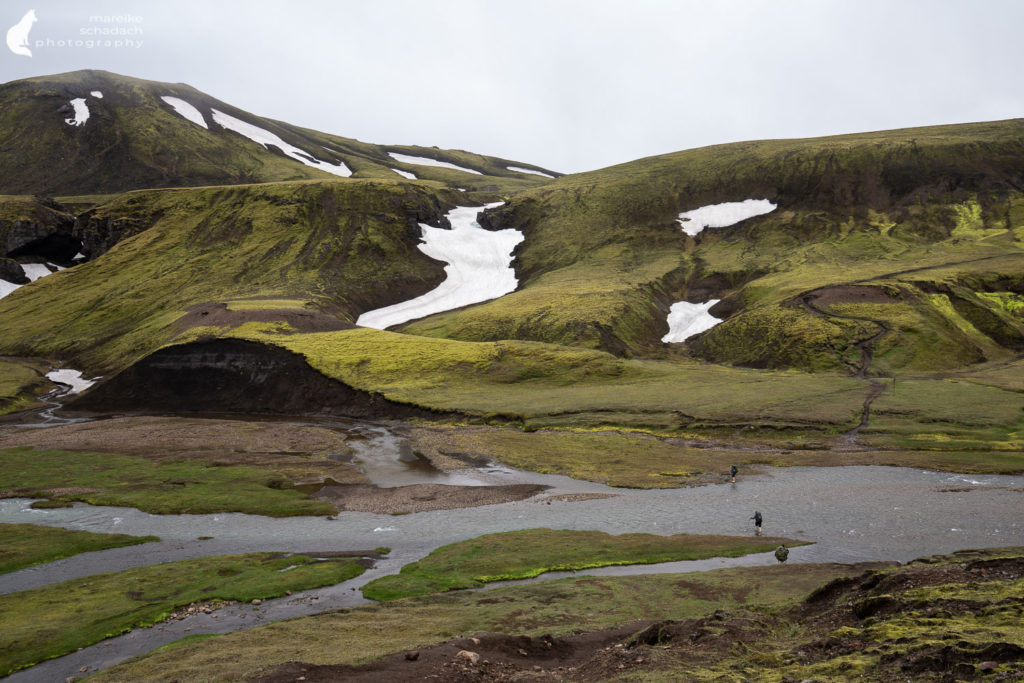
Shortly after I had firmly reconnected the sloping sole with the trekking boot, we had to take the boots off again immediately: a river blocked our way. This was the first ford on the Laugavegur for us - up to here we could jump over all the rivers, cross them with the help of stepping stones, or just walk through quickly.
So boots off, waders* on, pant legs up, open the hip belt, and trekking poles* in the hands.
Wading through a river: how to do it, you can see here .
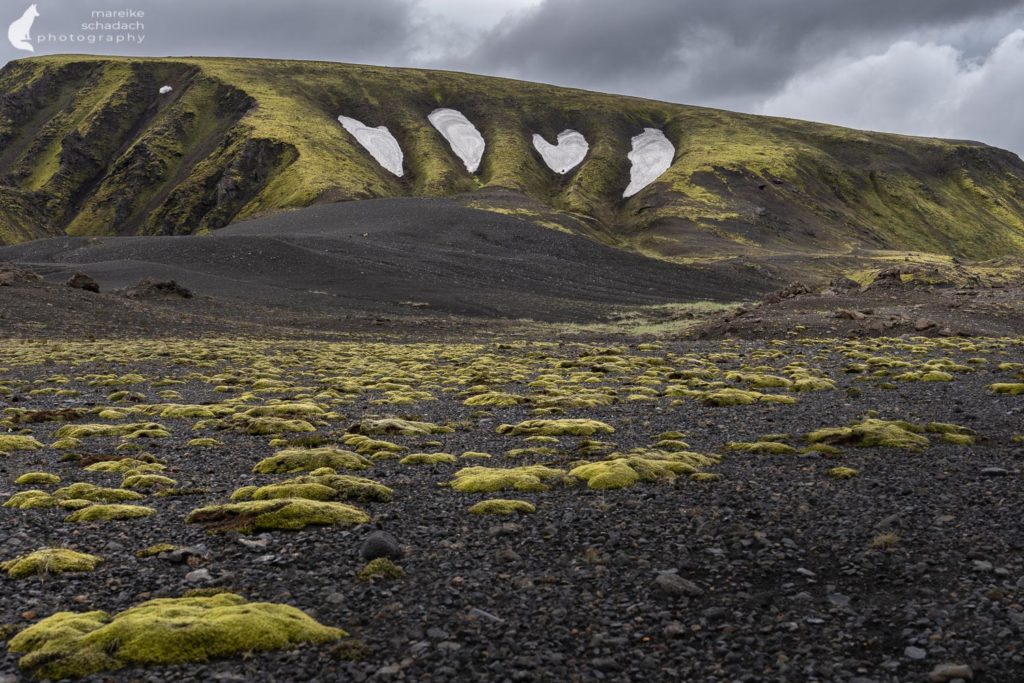
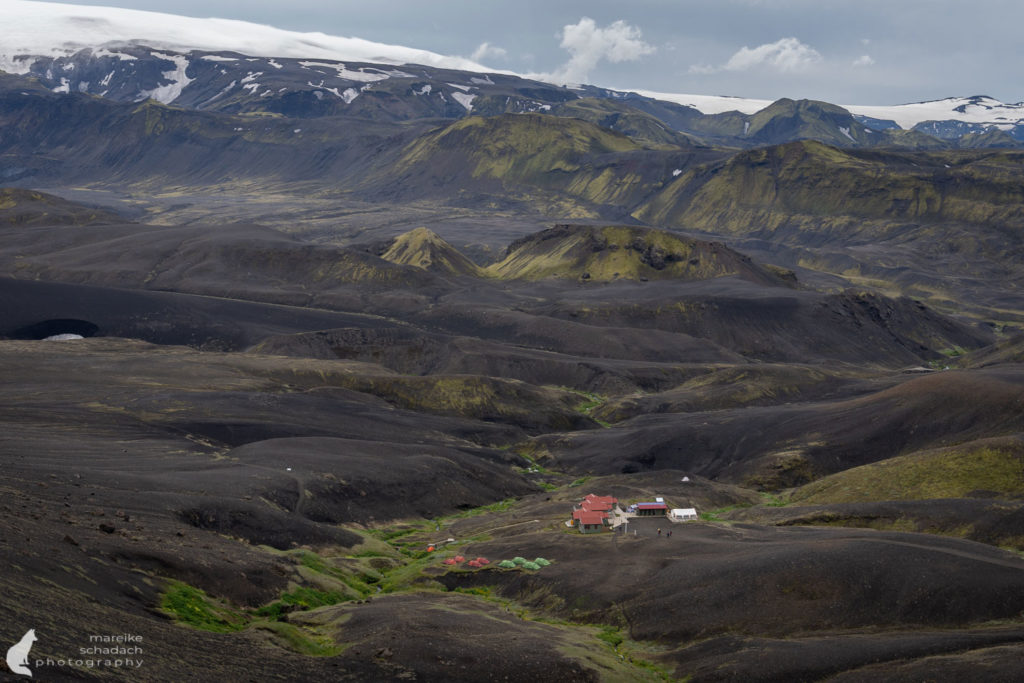
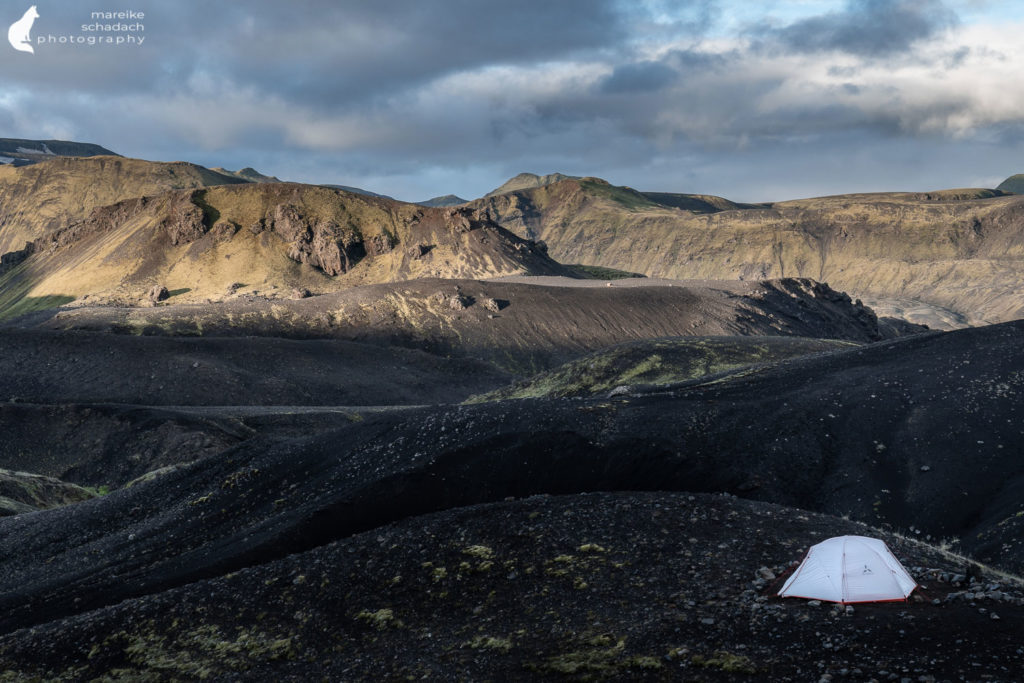
After about four kilometers we reach the Hvanngil hut with a beautiful and better wind-protected campsite. After that the landscape changes again, it becomes stonier and bright green, moss-covered mountains rise from the black plain. The way to the Botnar hut is long but offers many great motifs for all photo enthusiasts. With tired legs and feet, the view of the camp at the end is certainly one of the most beautiful motifs.
And because it is so beautiful here in the camp, we stay two nights and use our free day for a day trip and for photography. The first day we had pitched our tent at a great view. But for the second night we moved down into the valley, where it was much more sheltered from the wind.
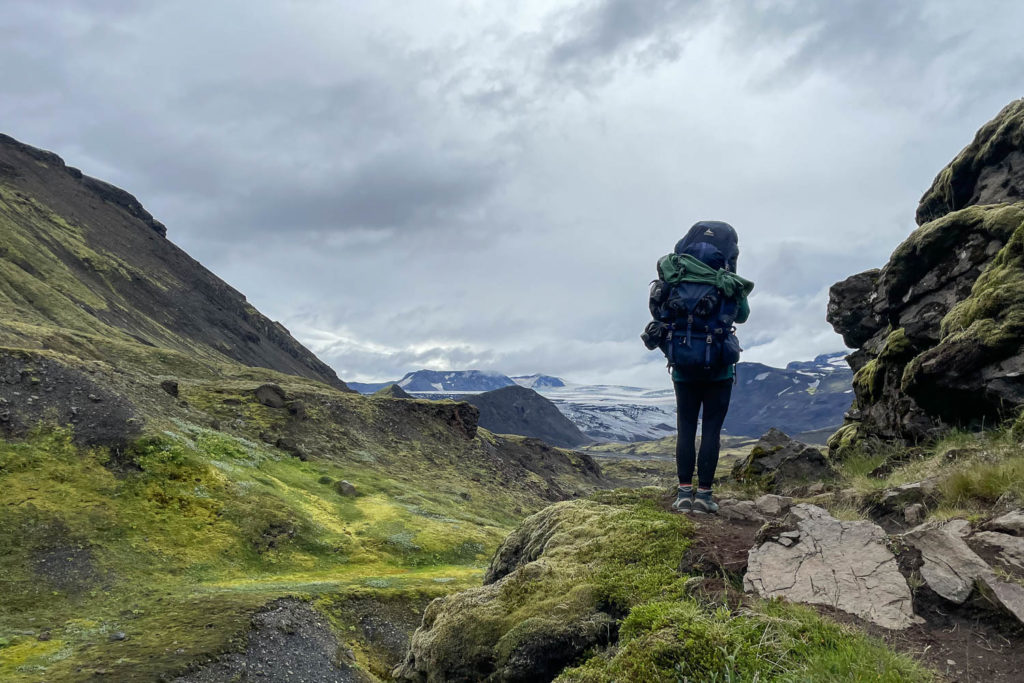
Hiking Backpack and Camera
In addition to the necessary hiking gear, I carried about five kilos of camera gear across Laugavegur. The camera was mostly hung around my torso, ready to hand. With the shoulder strap, it didn't bother me much. Only when I used trekking poles, the camera was a bit of a hindrance and I then tied it to the backpack.
The camera clips "Capture" from Peak Design, which many photographers like to use, with which you can attach the camera to the shoulder strap of the backpack, unfortunately did not fit on my backpack. I have to try again with other screws, the supplied were just too short. Now I have discovered from Tasmanian Tiger a camera mount for the backpack and modular lens bags that you can attach to the outside of the backpack. Maybe I'll give those a try.
How do you carry / attach your camera to your trekking backpack? Do you have any tips? Then write them in the comments.
Stage 4: Botnar to Thórsmörk
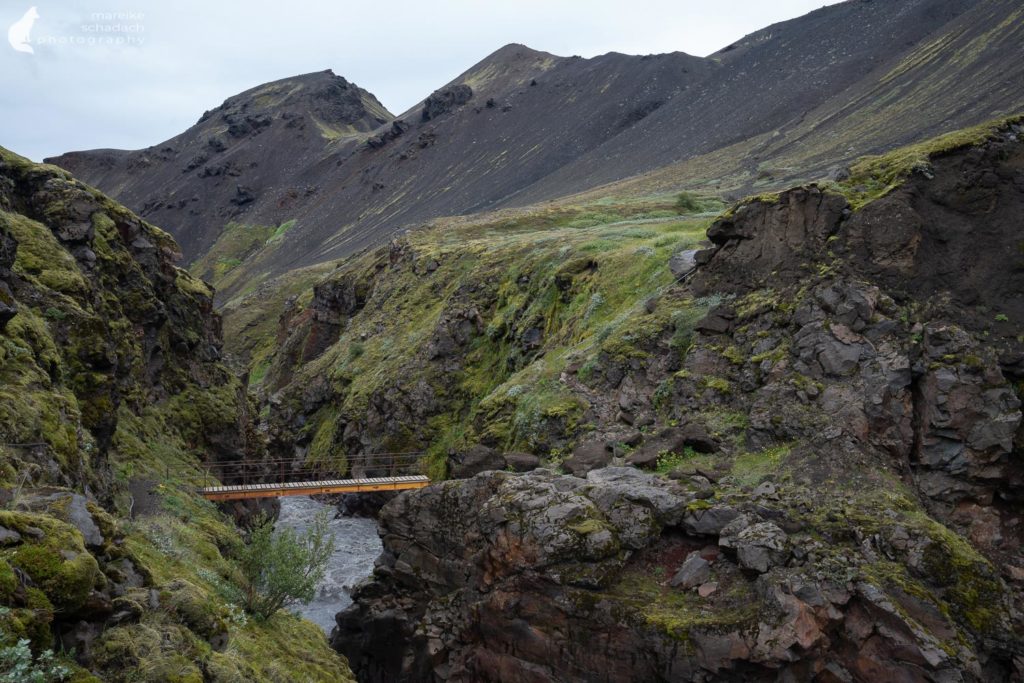
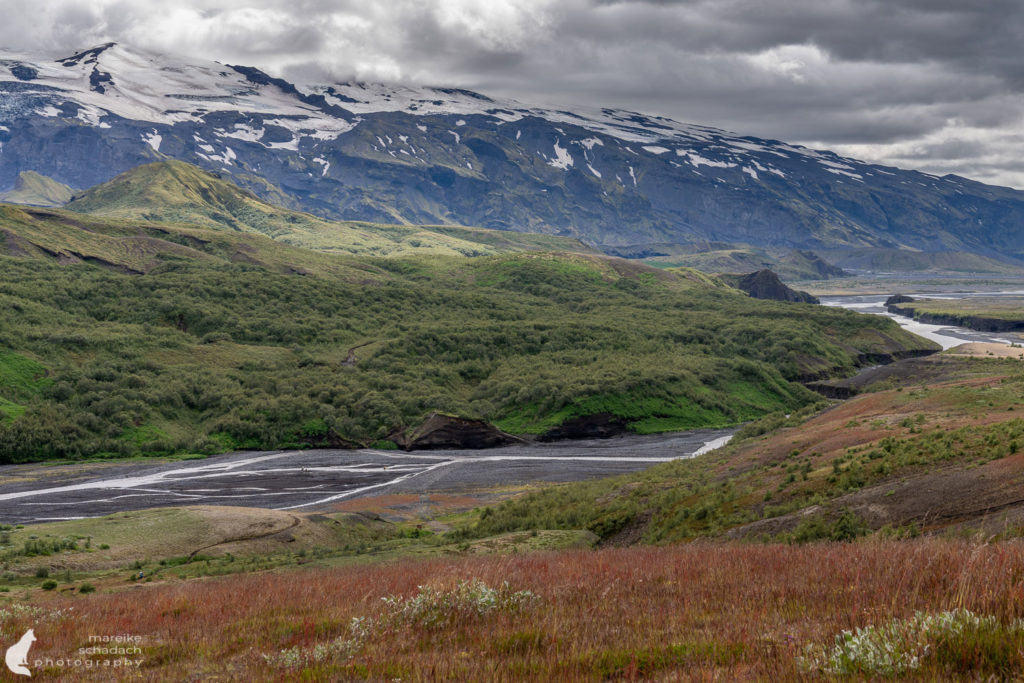
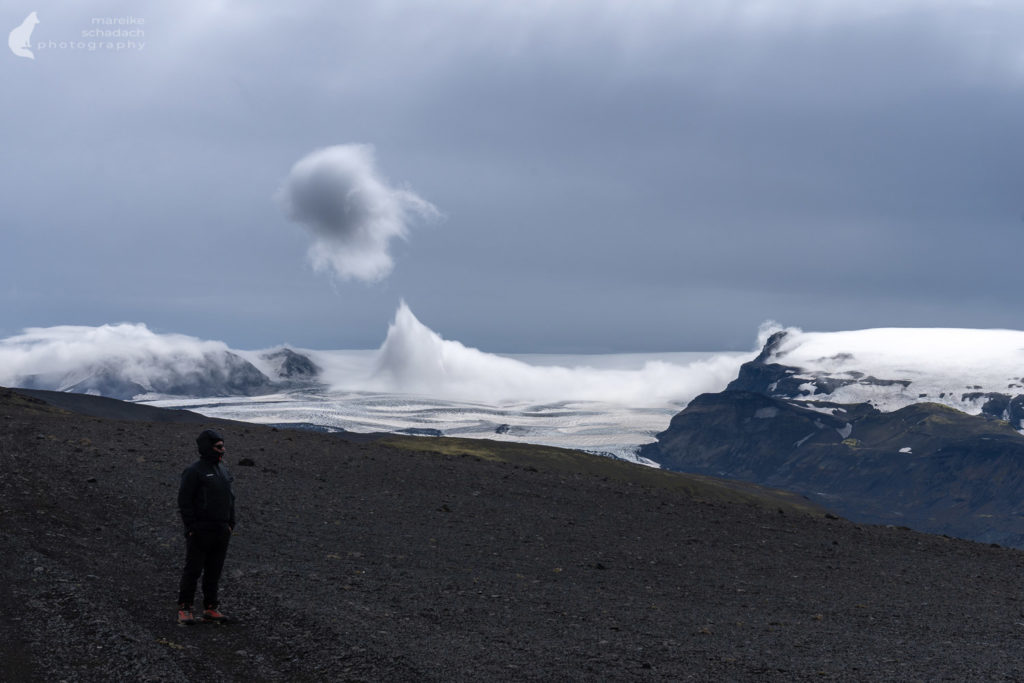
With a view of one of the many glacier tongues of the distant Mýrdalsjökull, we continue on the last section of Laugavegur. After a steep descent we cross the river Botnaá, which has cut deep into the rock. Fortunately there is a bridge. The landscape here looks completely different from the first three days. Later we walk through black sand on which willow bushes grow. After another climb we see the sea for the first time. It seems eternally far away. Thórsmörk, the legendary forest of Thor, on the other hand, is not so far away. But before we enter the forests of dwarf birches and yellow and blue flowers, we have to ford the river Þrongá. This was the deepest and widest river we had to ford.
Arrived at Camp Langidalur we first sit down in the sun and toast with a beer (at the reception you can buy all kinds of useful and tasty things). Almost wistfully we look back on the trail - is it really already over? The next day the weather is supposed to be nice. I decide to go further. In front of me lies the Fimmvörðuháls Trail, which leads between the two glaciers Mýrdalsjökull and Eyjafjallajökull to Skógar. I go on alone. My partner takes the bus back to Reykjavik, because the broken sleeping mat does not really invite to extend the tour.
There are three camps in Thórsmörk: Basar, Langidalur and Húsadalur. All three have a bus connection to Reykjavik. Langidalur is closest at the end of Laugavegur. At Basar is the trailhead of the Fimmvörðuhál. Here also many overlanders camp with their vehicles, who don't want to ford the river Krossa. Camp Húsadalur is the largest and offers the most comfort, including a restaurant, sauna, cabins and glamping tents.
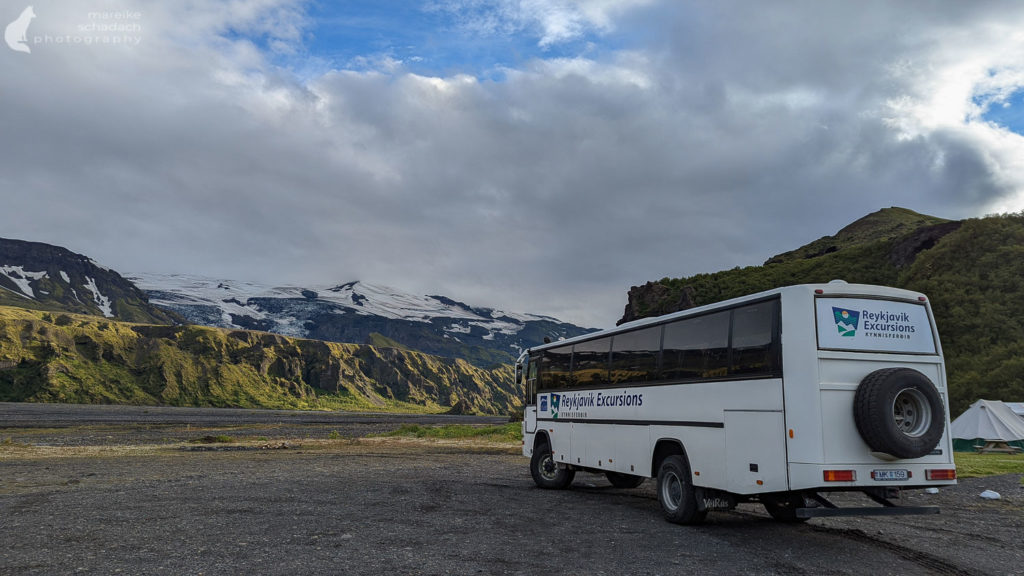
You can buy bus tickets online at Trex .
So what exactly made the Trekking on Laugavegur so special?
When I look back on the hike along Laugavegur, I would love to walk it again next summer. Iceland shows its prettiest side on these 55 kilometers, each stage has its own character. It never gets boring or monotonous. And the Icelandic weather then adds a bit more drama and atmosphere to the landscape. Simply beautiful. However, only if you are not freezing and not wet. But if you prepare a bit and take gloves, a scarf, a beanie, and long underwear with you on your summer vacation, you will have a great time on the trail.
Humid, stormy, irresistible - and sometimes the sun shines!
Many things that are necessary for the success of a trekking tour on the Laugavegur in Iceland, I have not gone into. These are, among others, the use of map, compass and GPS, stove and food, appropriate clothing, onion layer prinzig, emergency equipment ... The list could be continued even further. I will take up these topics in the coming articles.
Book Recommendations for Iceland
Do you want to know where the journey is going? Then I can recommend this travel guides* to you.
You can order the travel guides on Amazon by clicking on the pictures. If you buy a product via an affiliate link, I get a small commission and you help me to keep filling Fernweh-Motive with interesting articles. This does not make the product more expensive for you.


Do you know the Laugavegur Trail in Iceland? How did you like it? Do you have any questions or suggestions regarding my article? If yes, then write me a comment!
Do you want to know when there are new articles on my blog? Then follow me on Facebook, Pinterest or Instagram. I would also be very happy if you share my article with your friends.
Recommendations for further Reading
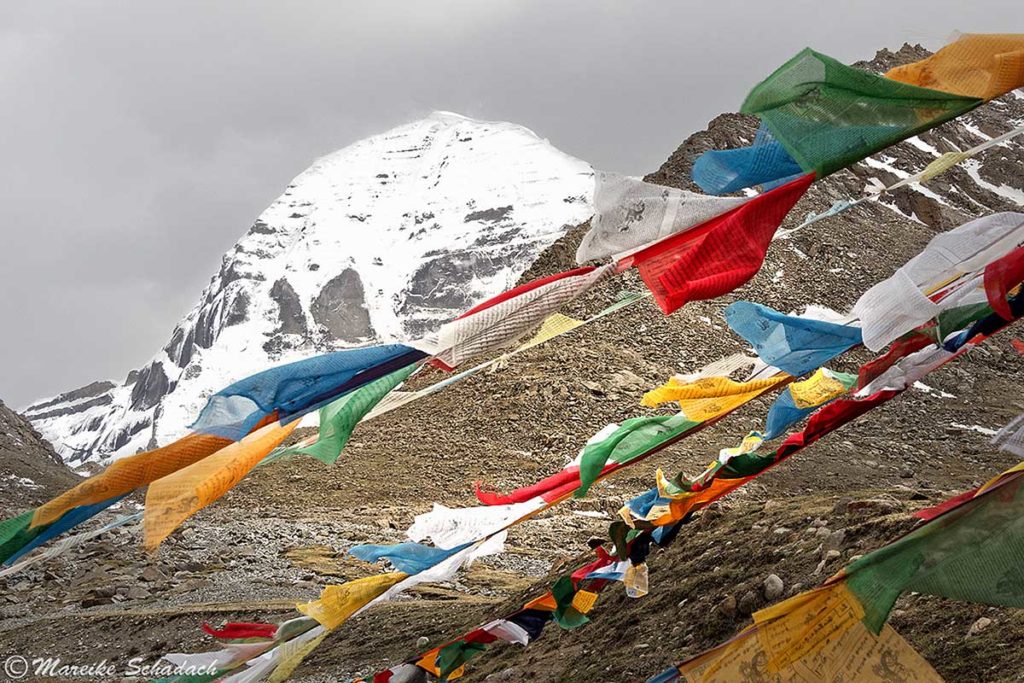
Do you love trekking as much as I do? Then you might also be interested in my articles about the circumnavigation of the holy Mount Kailash in Tibet about 100 kilometers of hiking on the Hexenstieg in the Harz mountains.


Super spannender Beitrag, der echt Lust darauf macht, den Trek zu laufen. Wir haben uns im Frühjahr ja auch in Island verliebt und können viele deiner Wetterbeschreibungen nachvollziehen – brrrr. 😀 Aber die Landschaft ist so unglaublich (ich habe auch angefangen, an Trolle zu glauben!) und das Licht/die Wolken sind so dramatisch, dass die Kälte und der Regen bei passender Ausrüstung wirklich nicht schlimm sind.
LG
Sarah
Hej Sarah, ganz lieben Dank für dein Kommentar! Ihr werdet den Laugavegur lieben, da bin ich mir ganz sicher. Und wie du schon sagst, wenn man sich warm, wasser-, und winddicht einpackt, dann kann man Island bei (fast) jedem Wetter genießen… und das macht es ja auch irgendwie aus 😉
Liebe Grüße, Mareike